Showing posts with label blogger. Show all posts

Download free windows live writter


Yes! you can blog offline. With growing technology like Windows Live Writer blogging is no more limited to your dashboard. You can write, save and publish posts right from your computer without signing in your blogger account. Blogger HTML editor lacks many features when it comes to writing a good looking post. On contrary windows live writer is a software built by Microsoft Corporation which contains every feature that Blogger lacks.
I hate blogging without Windows Live Writer! I am sure many bloggers would agree with me on this point.


Some of the things you can’t do with Blogger HTML editor are,
You can not write HTML code just the way it looks in blogger editor because the code is interpreted as a command and blogger editor converts it to how it may look in a browser.
You can’t resize an image to whatever size you like because you are provided with only three options i.e Small, Medium and Large size.
The font type and font size is limited.
You can not undo what you have done (Going backward).
You can’t align images to the left or right of your intro paragraph.
You can not add effects to your images, like shadow effect, rounded corners, emboss, blur etc.
You can not post an image in its original size
You can not insert tables in your posts because no table option exists
You can not open a link in a new window unless you edit the HTML
You can not add a world map to your posts
And much more. . . . .

You can not do all above in a compose mode unless you add or change the HTML code in your HTML editor. But editing HTML would seem difficult for a newbie whilst pretty easy for a professional. Since most people like me have limited knowledge about editing HTML, blogger editor is of little use to all of us. Luckily! Windows Live Writer comes to our rescue. It can to do what ever blogger editor can not. It contains every feature a blogger is looking for. One of the best things I like about it is that it saves a copy of your blog interface/theme and when you write posts, it will be just like writing a post straight into your blog. See the image below to understand what I mean to say,


  • Moreover your images can be displayed in two different ways look below,


  • Selecting the photo album option will display your images in a scattered style (with a view album link below your scattered images),


  • So go and download it right now by clicking the link below.

Download here

 photo Animateddownloadbutton_zps817f5b7f.gif


Read more

Encrypt and make your pen-drive password protected.

Do you have lot of movies, audios, documents on usb drive and care about someone accesses your data by stealth? StorageCrypt is the solution of usb encryption. StorageCrypt allows you to encrypt and password protect removable drives, including USB drive, eSATA drive, firewire drive, flash cards, PCMCIA drive and more. It uses 128 bit AES encryption for maximum security. User password length up to 50 characters. Fully portable use, you may take it to anywhere on the fly without the software installed on each machine

USB Secure helps you password protect USB drives, Thumb drives, Memory cards, External drives and Flash drives. It supports plug and play and runs automatically once a USB drive is plugged in, asking you the password for it. USB Secure is hassle free and it doesn't need a rocket scientist to master.

USB flash drives are the most popular way to move data from one PC to another. They are small in size but can carry gigabytes of data. They are easy to use, convenient, affordable, but at the same time they pose a security risk and can be easily lost, stolen or misplaced. A secure USB drive with password protection is a must these days as the data that it contains may cost you millions of dollars if stolen or lost.

With USB Secure your USB flash drives and all other external storage devices can be very easily password protected. An easy to use setup program will guide you to put the program on your USB drive. It can automatically detect all such drives currently plugged into your PC. After installing simply run the software, and set and confirm a password to protect USB drive and all the data in it.

To access your data again, it is important that you plug-in your USB drive into the computer and choose the Open this USB drive with password option from the Windows Autoplay that pops up every time you plug-in your USB drive. You can also double click the USB drive in your PC to launch the program. To unprotect your secure USB drives, click Unprotect and enter correct password to access your data again

Another great feature of USB Secure is that it doesn't require any Administrator rights to run and therefore there is no need to install it at the other end to retrieve the protected data. The program also supports plug & play and ask for a password immediately when the drive is plugged-in.


To make  your pendrive password protected just follow these steps:

  • insert your pendrive which you want to make password protected.
  • open my computer and select pendrive and right click on it and select "turn on bit locker".


  • Now a new window will be appear there and now check on "use a password to unlock this drive".
  • Now type your password and click on next.
  • Now you will be asked "How Do You want to back up Recovery Keys " Choose From the options.
  • Then you have to choose whether your drive is already in use or if it is new. Then click next.
  • Choose how much Of Your Drive to Encrypt, Entire drive or Just Used Disk Space.

  • At last Click on Start Encrypting, Encrypting Process Will start.

Read more

add facebook floating box on your blog

I found a script online that adds a floating Facebook button to right side of your blogs or websites. The button upon clicking slides towards left revealing a Facebook Like Box. It is an excellent coded slider that Hides the Likebox inside a container and reveals it only when visitors hovers the cursor on the floating button.  You can use the same code to add it to your websites or any webpage you may have. So lets add this cool Floating Like Box to your blogger blogs.

Facebook Floating like box is very easy to use. You also  see this on many  website / blogs. Make your blog  more attractive by using  this social  media  widget in Blogger. Many other websites  also share this widget but i also  share this beautiful  widget with you. This widget  is pop out when   mouse cursor hover  it otherwise this  is fixed on the right      side of   your blog page. You  can change its position but it looks attractive on the  right side. This widget has built in CSS, JavaScript, and HTML etc..


Recently we shared simple Facebook like box widget. Now today I am sharing another New Floating Facebook like Box Widget for Blogger. Facebook pop up like box now a days used by many bloggers and webmaster to increase their Facebook fan page traffic in short period of time. You just need to put small code to your Blogger Blog. Today I will show you How to Add New Floating Facebook Like Box Widget For Blogger.
  • follow the steps to add this like box to your blog.
  • Here are the two simple steps to place this sliding like box on your blog.
  • first of all goto the blogger > template > Edit HTML.
  • Now Find </head> by using (CTRL+F).
  • Now paste the code given here above the </head> tag.
===========================================
<script src="https://ajax.googleapis.com/ajax/libs/jquery/1.6.1/jquery.min.js" type="text/javascript"></script>
=================================================================


  • Now click on Save template.
  • And go to blogger > layout.
  • And Click on "add a gadget" and add a HTML/javascript gadget.
  • Now paste the code given here is that box.
=================================================================

<a href="http://hotspotech.blogspot.com" target="_blank" title="Blogger Widgets"><img src="http://safir85.ucoz.com/24work-blogspot/cursor-24work-10.png" border="0" alt="Blogger Widgets" style="position:absolute; top: 0px; right: 0px;" /></a><script type="text/javascript"> 
//<!-- 
$(document).ready(function() {$(".w2bslikebox").hover(function() {$(this).stop().animate({right: "0"}, "medium");}, function() {$(this).stop().animate({right: "-250"}, "medium");}, 500);}); 
//--> 
</script> 
<style type="text/css"> 
.w2bslikebox{background: url("https://blogger.googleusercontent.com/img/b/R29vZ2xl/AVvXsEi2kM39okFxPHkGyRyhp5ZhaQGxjx74kvR__NysXPVEltOHnjh-Zb3mn7xx_yeQX62SPUTX8ShyYC9f4yrYbwlMs_39oKM5H4MsP-4VbqWj5osBYL_VnhnLVCJr-ONA-g4UZtZ80EwLPwzf/s1600/facebookbadge.png") no-repeat scroll left center transparent !important;display: block;float: right;height: 270px;padding: 0 5px 0 46px;width: 245px;z-index: 99999;position:fixed;right:-250px;top:20%;} 
.w2bslikebox div{border:none;position:relative;display:block;} 
.w2bslikebox span{bottom: 12px;font: 8px "lucida grande",tahoma,verdana,arial,sans-serif;position: absolute;right: 6px;text-align: right;z-index: 99999;} 
.w2bslikebox span a{color: #808080;text-decoration:none;} 
.w2bslikebox span a:hover{text-decoration:underline;} 
</style><div class="w2bslikebox" style=""><div><iframe src="http://www.facebook.com/plugins/likebox.php?href=https://www.facebook.com/Hotspotech&amp;width=245&amp;colorscheme=light&amp;show_faces
=true&amp;connections=9&amp;stream=false&amp;header=false&amp;height=270" scrolling="no" frameborder="0" scrolling="no" style="border: medium none; overflow: hidden; height: 270px; width: 245px;background:#fff;"></iframe><span> / <a href="http://mybloggerwidgets.blogspot.com/">+Get This!</a></span></div></div> 
</div>
=================================================================

  • Now replace https://www.facebook.com/Hotspotech with your facebook page name.
  • And now click on save gadget and paste it anywhere you want.
  • Finally all done!!
Read more

add floating social media icons on your blog

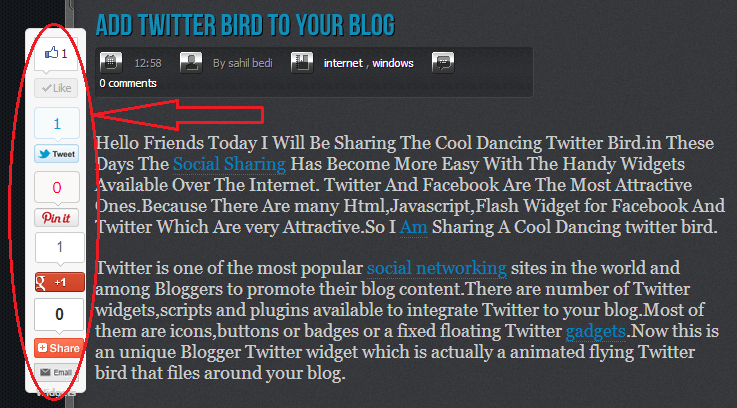
Social media is a way to get more traffic to your blogs and websites. Adding the floating Google +1, Facebook, pinterest and Twitter buttons in blogger's blog is therefore very important. Getting these buttons provides you with a great chance to make your site popular among followers.

In this tutorial I will Show you a simple trick to add the floating or Flying  Google +1, Facebook, pinterest and Twitter buttons in your blog .This is so much important for all the bloggers as  a reader reads the post and wants to share your article/post it is so easy for him to do so on Facebook, Google + 1 and Twitter. 
Just follow the simple steps to add the floating Google +1, Facebook and Twitter buttons. 


Social media is becoming more and more important after each and every day. Now the experts says that social media plays a major role in SEO too...strange right? But its a fact, in simple words, the number of peoples who likes/shares your article will be counted in your ranking. So its your responsibility to make it easy for your readers to share your content.

I have seen some prominent blogs using social sharing buttons at the top of the post as well as at the bottom of the post. Yes their strategy is absolutely right and that will give them some extra likes/shares. But using it at top and bottom is bit nasty, there is where this widget will come handy. This widget which is placed just below the post title will floats along with the screen while the visitors scrolls down. Which makes it easier for the visitors to share the posts whenever they like while reading the post.


  • First of all go to the layout and click on "add a gadget".
  • Now A pop-up box will open on the screen.
  • now select the "HTML/javascript" button.
  • Now Enter the code given below here.
=========================================
<style>
#pageshare {position:fixed; bottom:15%; left:105px; float:left; border: 1px solid white; border-radius:2px;-moz-border-radius:5px;-webkit-border-radius:5px;background-color:#ffffff;padding:0 0 2px;z-index:10;}
#pageshare .sbutton {float:left;clear:both;margin:5px 5px 0 5px;}
.fb_share_count_top {width:48px !important;}
.fb_share_count_top, .fb_share_count_inner {-moz-border-radius:3px;-webkit-border-radius:3px;}
.FBConnectButton_Small, .FBConnectButton_RTL_Small {width:49px !important; -moz-border-radius:3px;-webkit-border-radius:3px;}
.FBConnectButton_Small .FBConnectButton_Text {padding:2px 2px 3px !important;-moz-border-radius:3px;-webkit-border-radius:3px;font-size:8px;}
 </style>
<div id='pageshare' title="Share This With Your Friends">
<div class='sbutton' id='rt'><a href="http://twitter.com/share" class="twitter-share-button" data-count="vertical" >Tweet</a><script src='http://platform.twitter.com/widgets.js' type="text/javascript"></script></div>
<div class='sbutton' id='fb'><a name="fb_share" type="box_count" href="http://www.facebook.com/sharer.php">Share</a><script src="http://static.ak.fbcdn.net/connect.php/js/FB.Share" type="text/javascript"></script></div>
<div class='sbutton' id='gplusone'><script type="text/javascript" src="https://apis.google.com/js/plusone.js"></script><g:plusone size="tall"></g:plusone></div><br/><div style="clear: both;font-size: 12px;text-align:center;"><a href="http://www.hotspotech.blogspot.in/search/label/Widget" target="blank"><font color="silver">Widgets<font></font></font></a></div></div>
===========================================
  • Replace http://www.hotspotech.blogspot.in/ with your site name.
  • Click on save gadget.
  • Now All Done.
  • Go to your site and check it out.

Read more
Blogger Widgets